After finding disjointed information all over the net about a problem with my sewing machine (abovementioned), I decided to put some clearer instructions right here…right now!
So, here’s the problem.
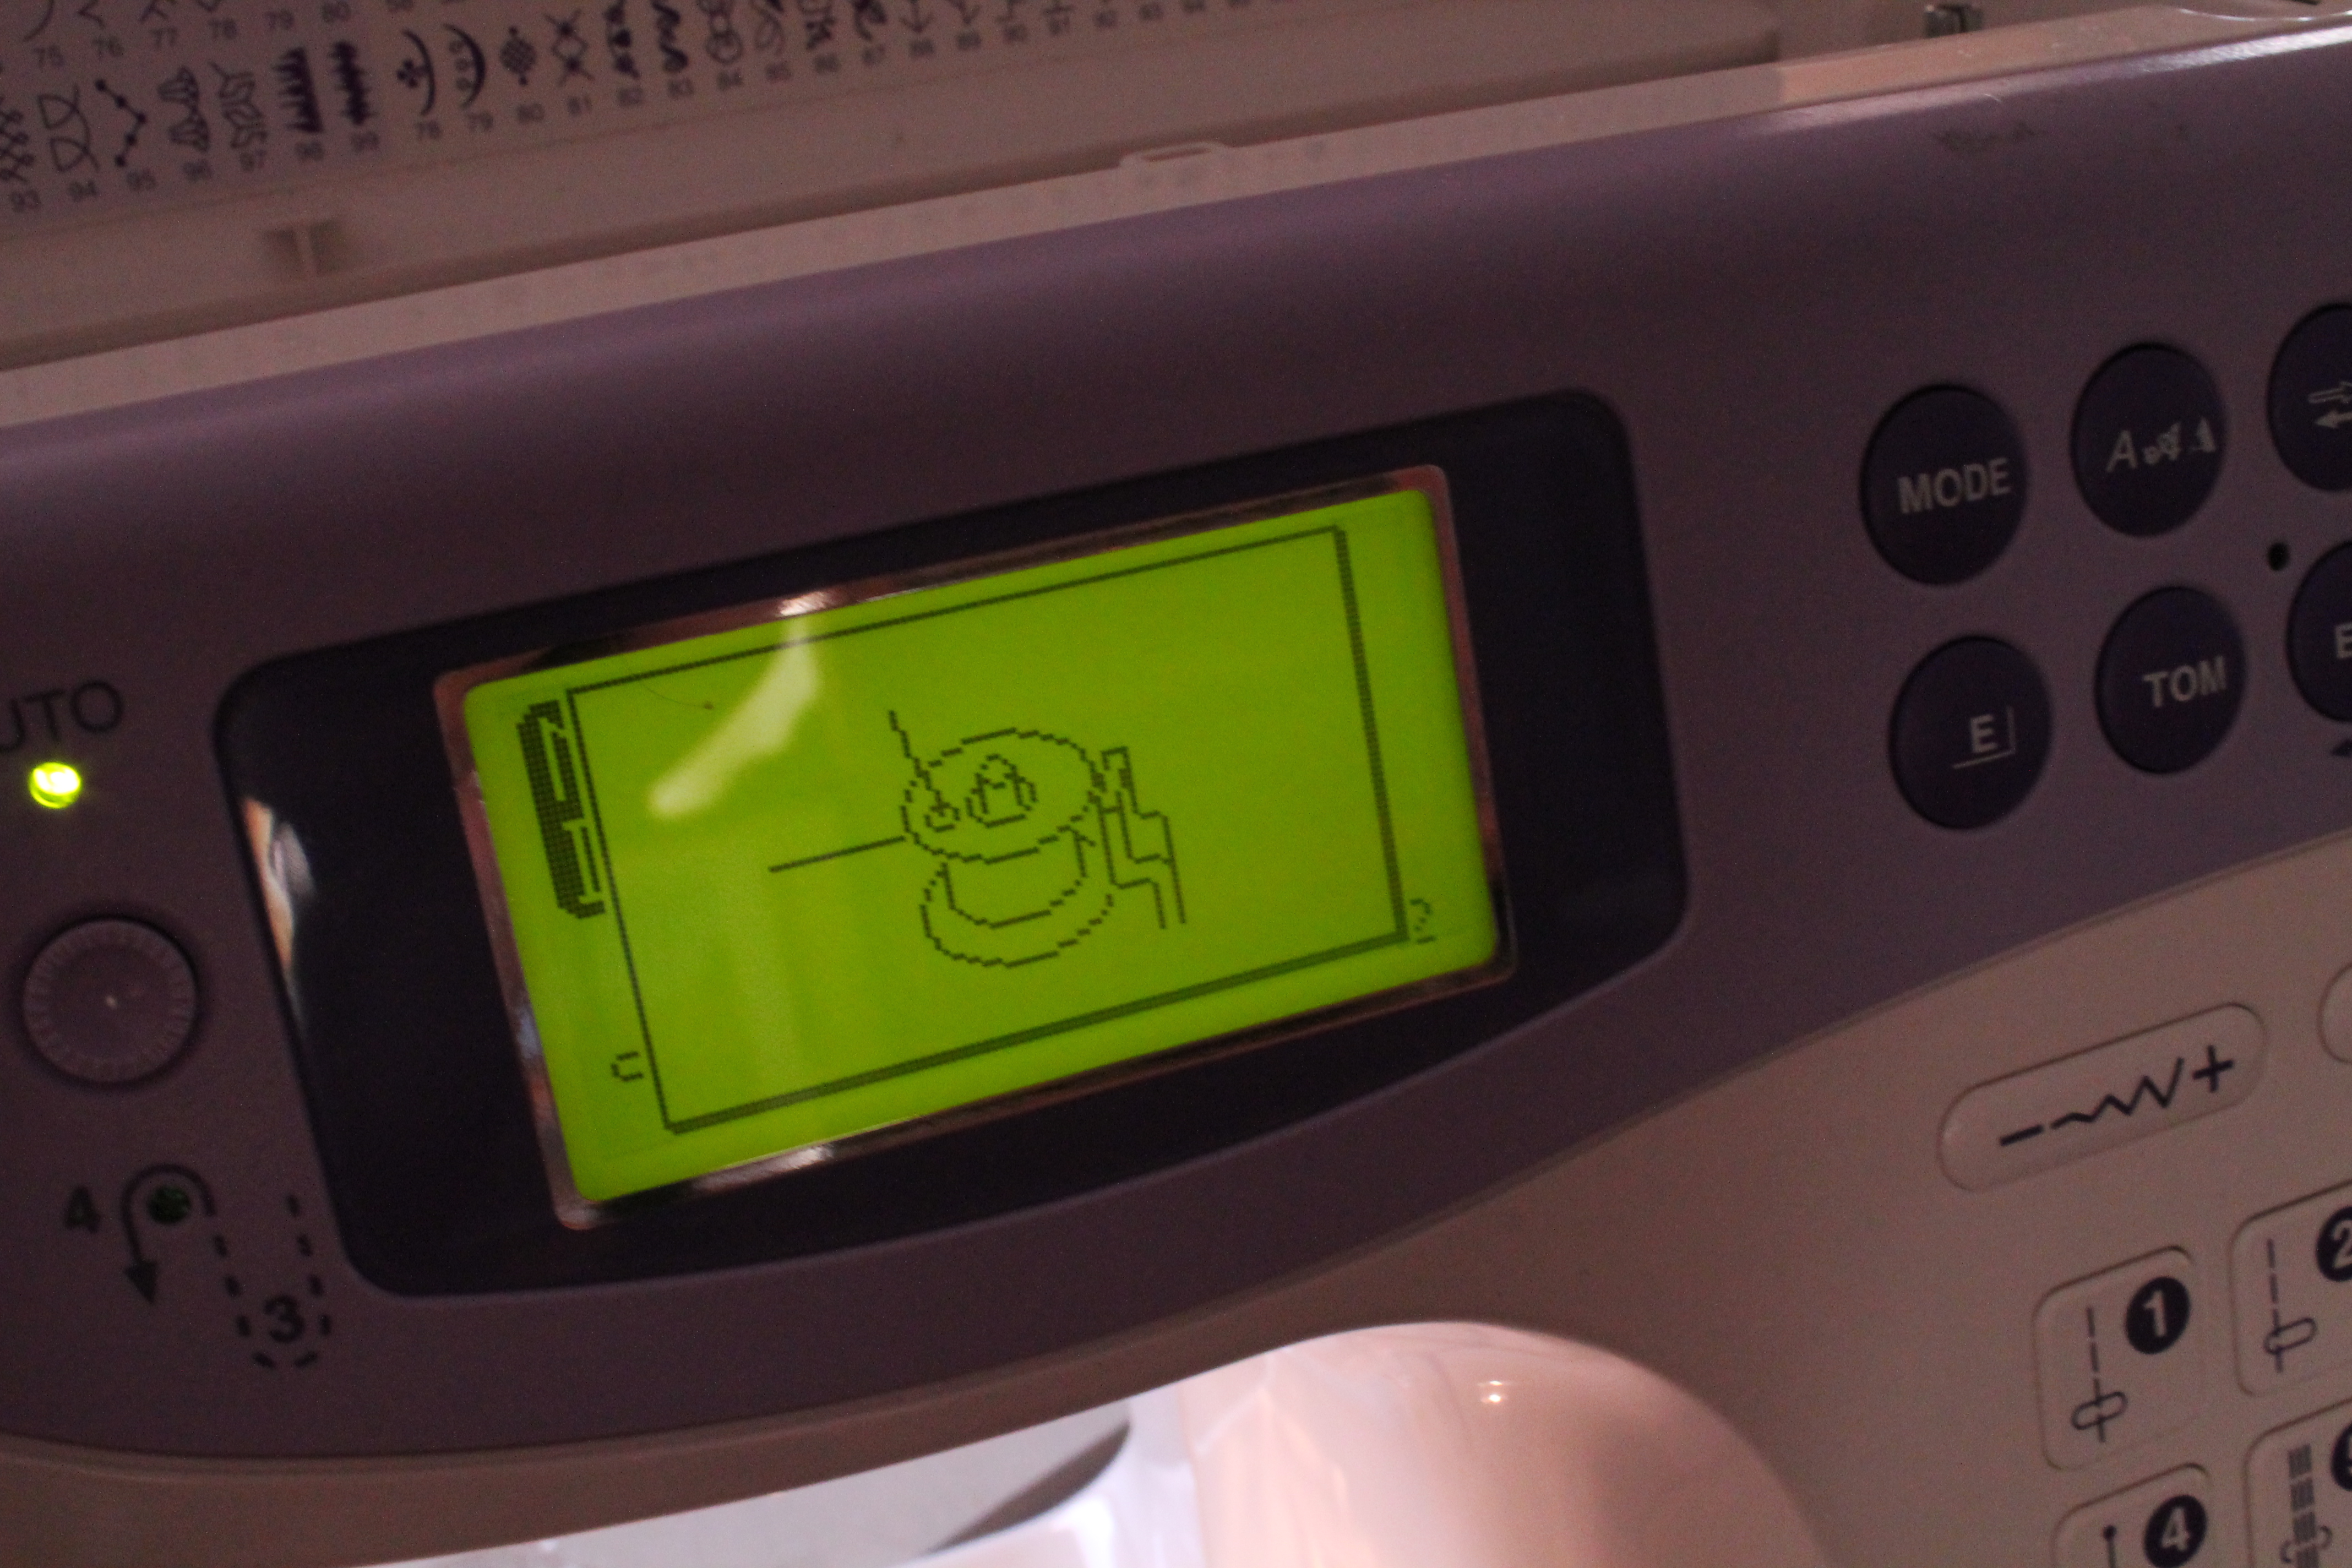
You’ve just wound a bobbin on your Janome MemoryCraft 4900QC. You click the spindle back to normal sewing mode when HELLO, the bobbin icon stays on the screen!
Oh no, you can’t do anything with your machine!
These new electronic fan-dangled things! Why on earth don’t you just own a treadle sewing machine and just be done with computerisation!
What do you do?
Well, instead of cursing your machine and vowing to never again touch a sewing machine with it’s own brain, think about fixing it yourself (before taking it back to the serviceman, that is).
You may find it’s your bobbin winder sensor not engaging.
To check if this is the problem, go straight to step ‘3’ below.
Follow these COMPLETE instructions if you find that your bobbin winder sensor needs adjusting:
- Turn off the machine.
- Remove the top cover.
This step requires photos:
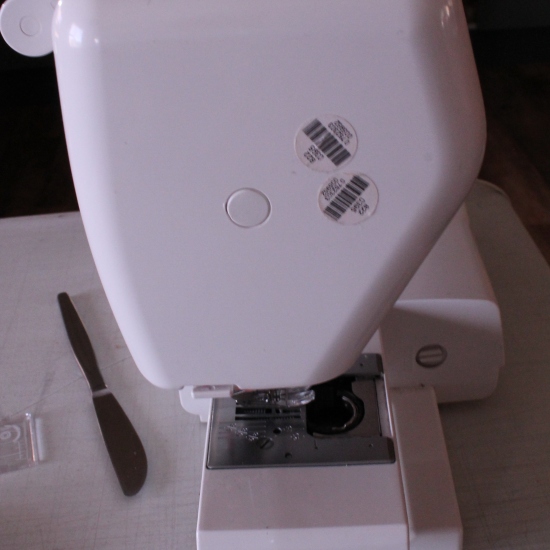
Remove the cap over the light cover screw. 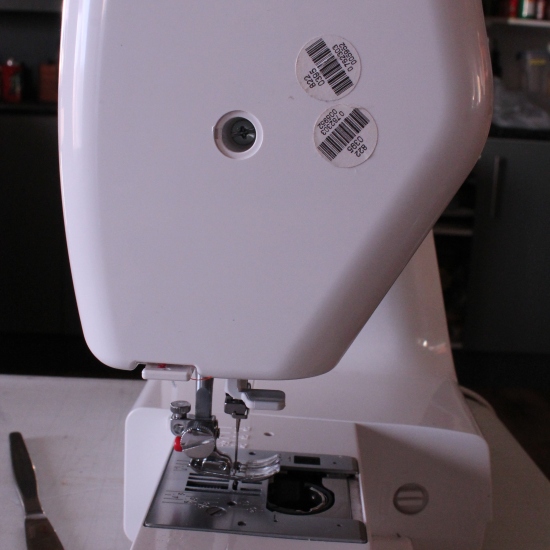
Remove the light cover by removing its screw. 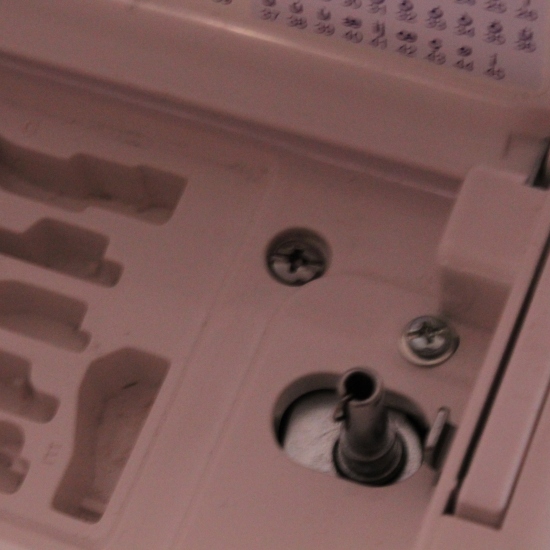
Remove the large screw above the bobbin winder spindle. 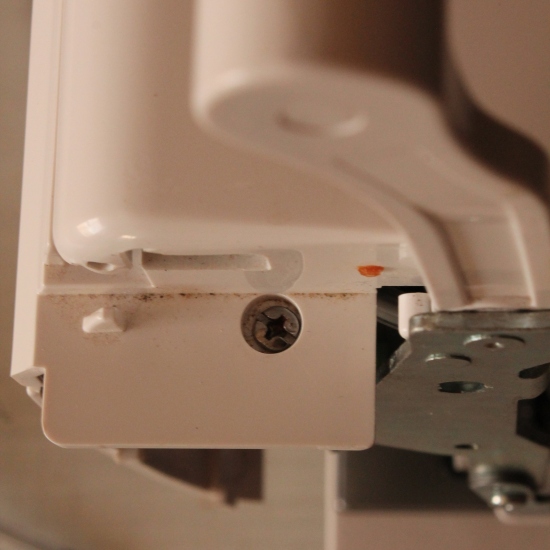
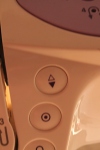
Remove screws from under the handles. 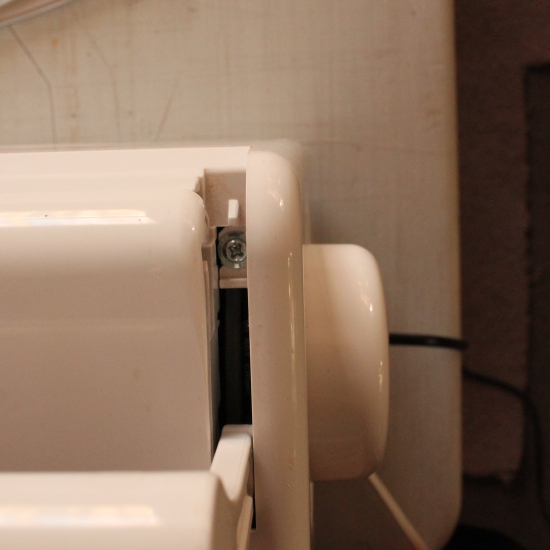
Remove screws from under the handles. 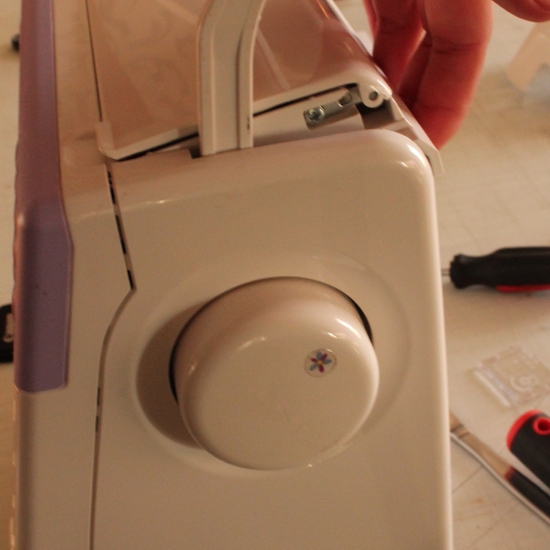
Remove hinge clips from top cover. 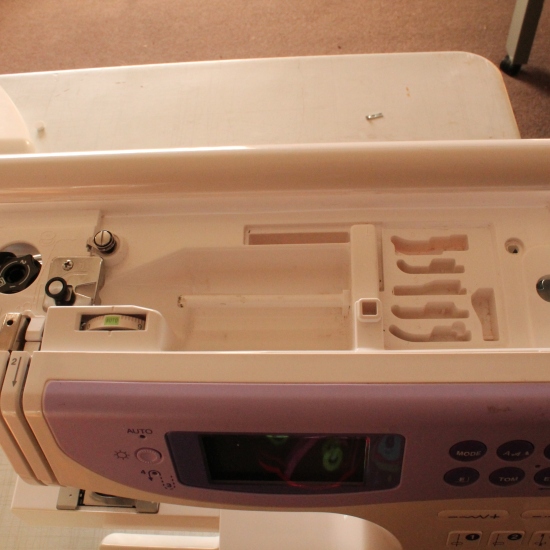
Ready to wiggle out. Lift the back of the top cover and wiggle back and forth until you hear a click. It will sound like it has broken, but it has just unclipped from the machine. 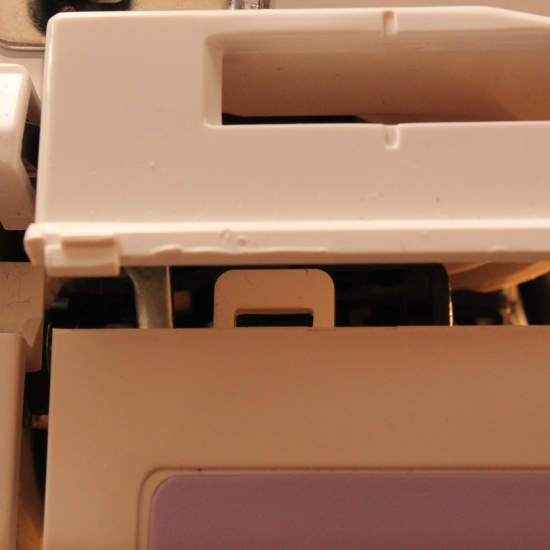
The top cover clips into this slot in the machine. 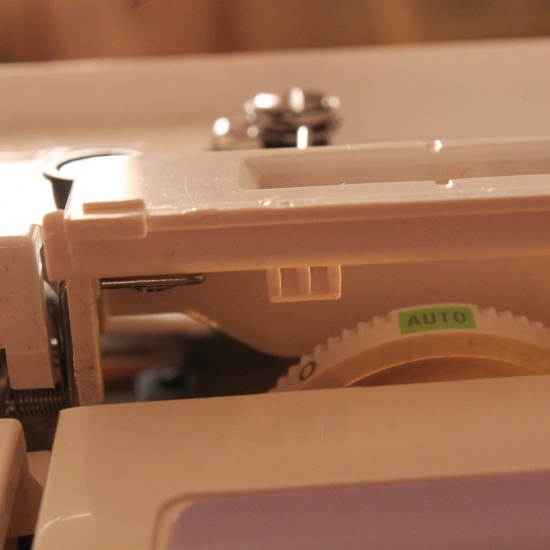
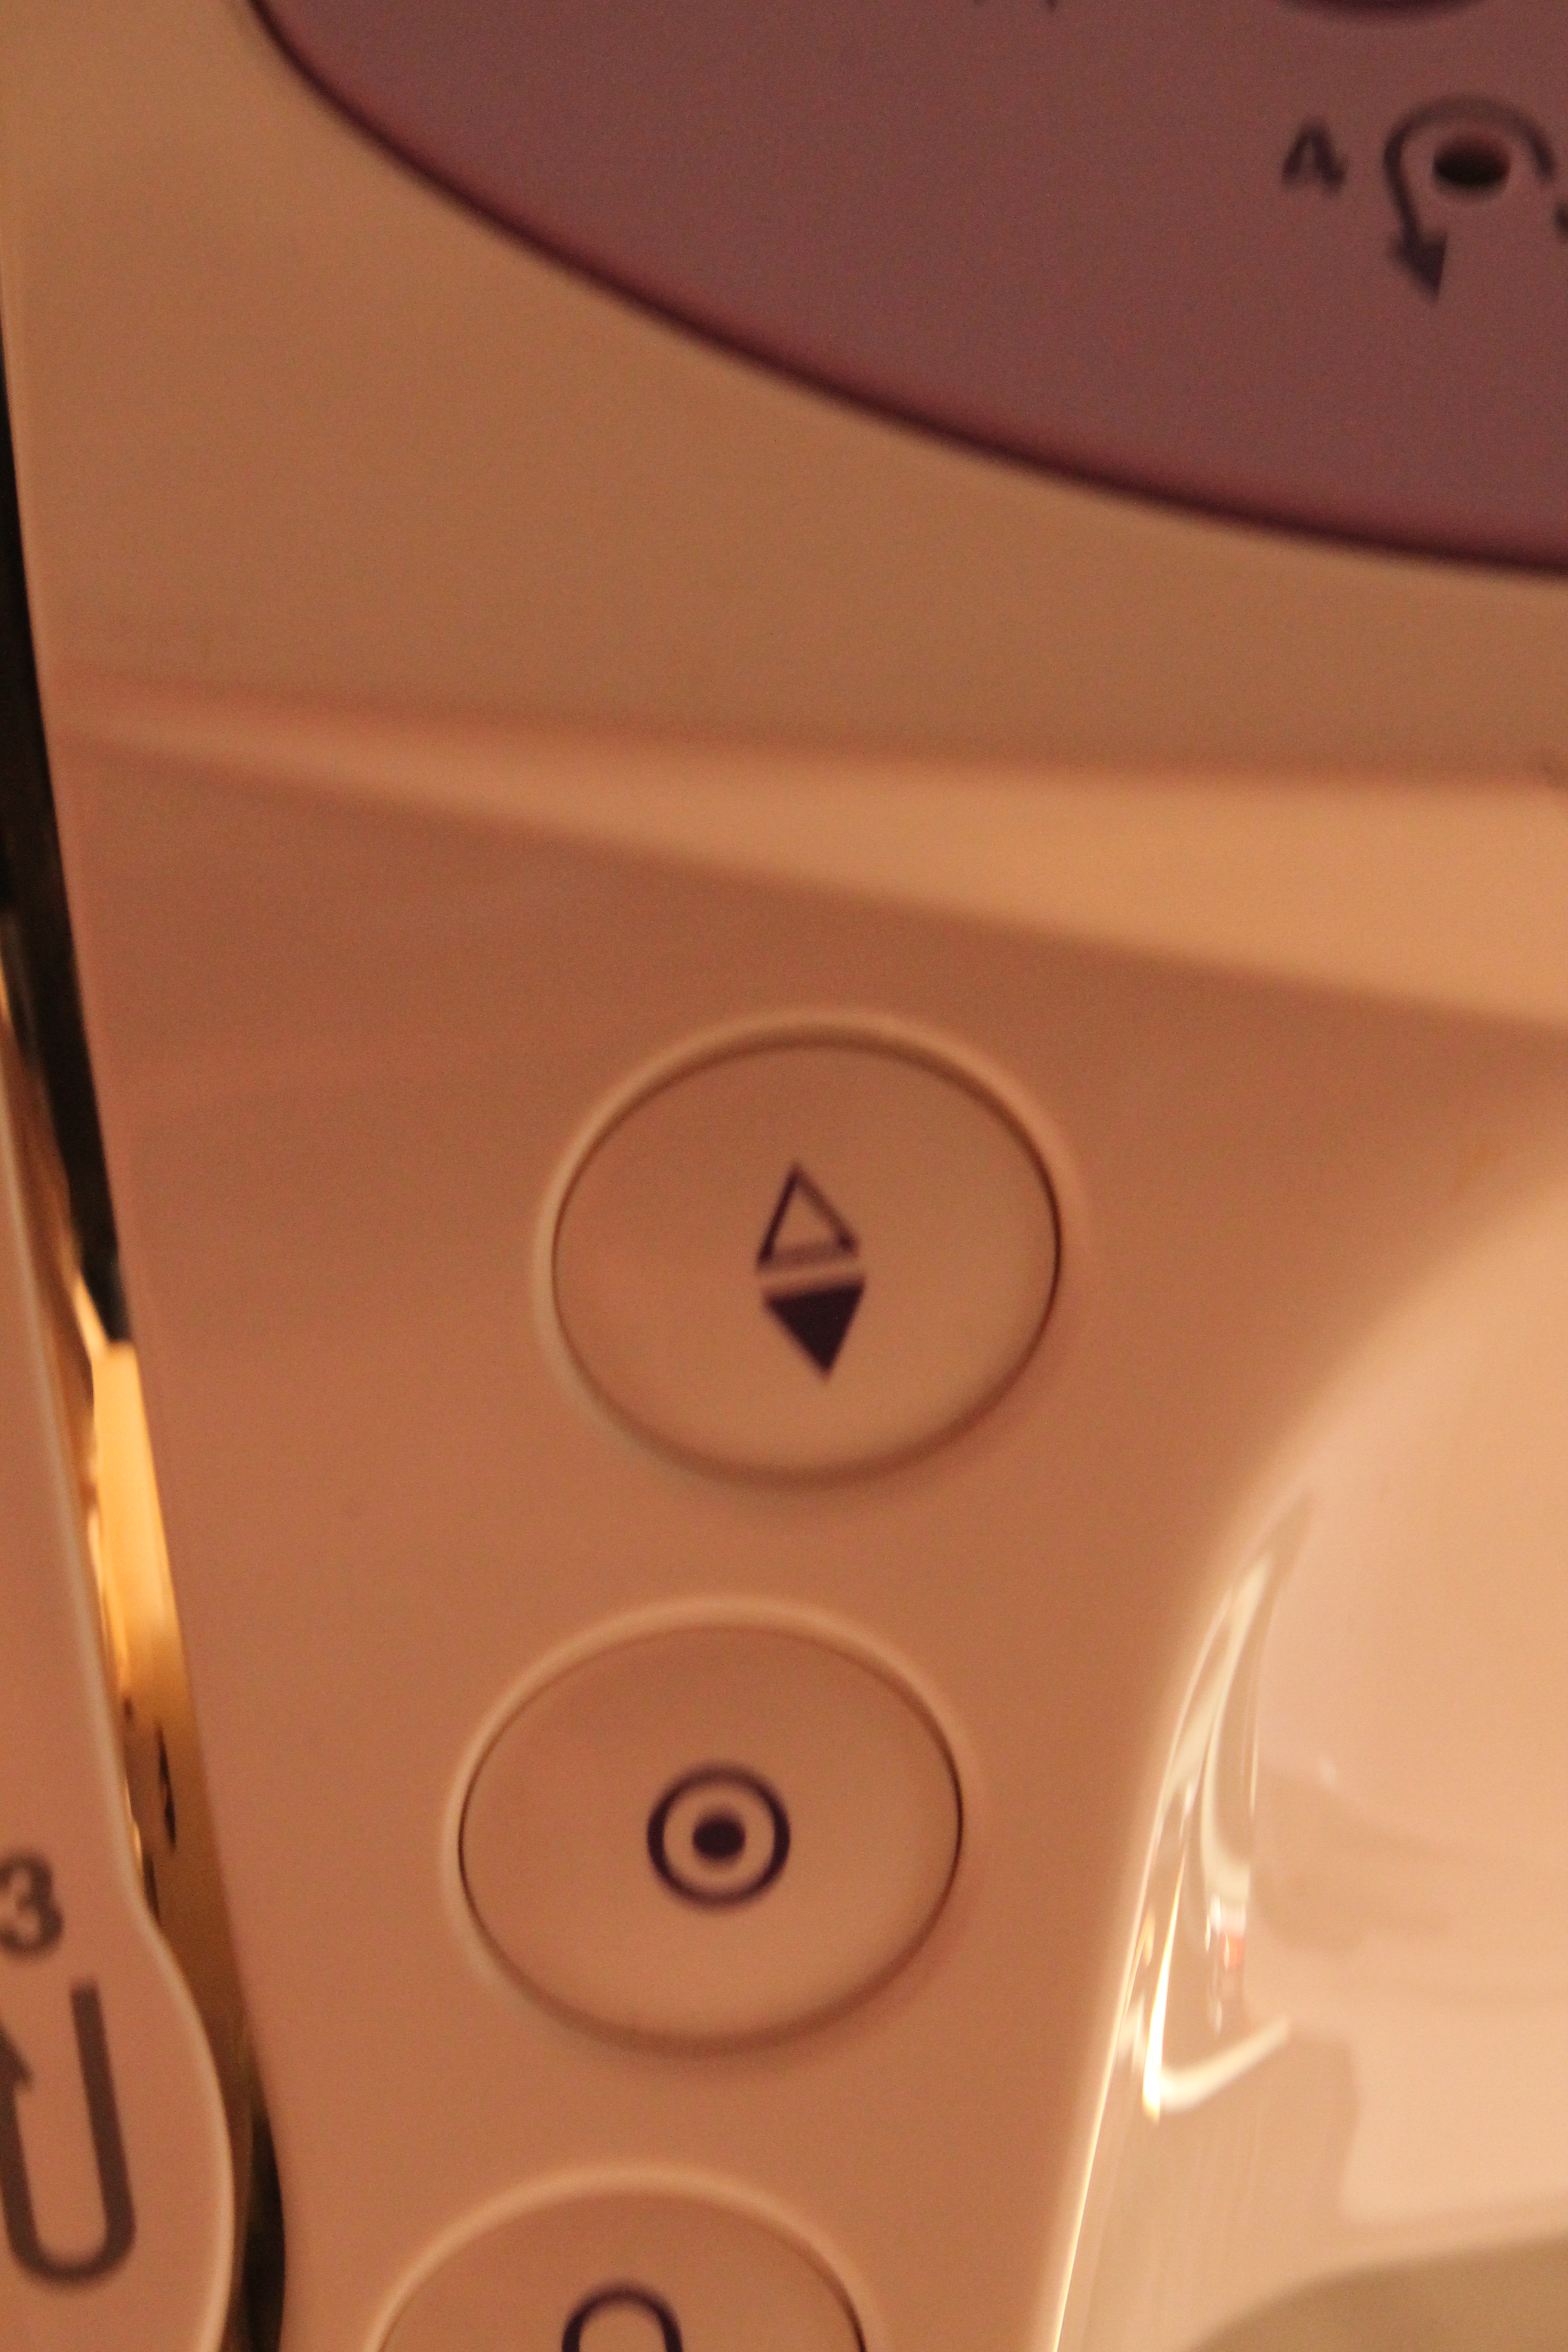
Be mindful of these clips when pulling up the top cover - Enter ‘Adjusting mode’: Turn on the machine and at the same time push down the needle up/down button and the stay-stitch button.
Push these buttons at the same time you turn on the machine. Press ‘5’ when menu comes up.
You are now in ‘Adjusting Mode’.
We need to focus on SP (bobbin spindle position). Click over the bobbin winder to see if it’s values change to either ‘OFF’ or ‘ON’. If not, then we definitely need to adjust the sensor.
NOTE: The SP should show ‘ON’ when bobbin winder spindle is set to the bobbin winding position. And/or ‘OFF’ when bobbin winder spindle is returned to sewing. - Loosen setscrews to adjust position of the switch fixing plate.
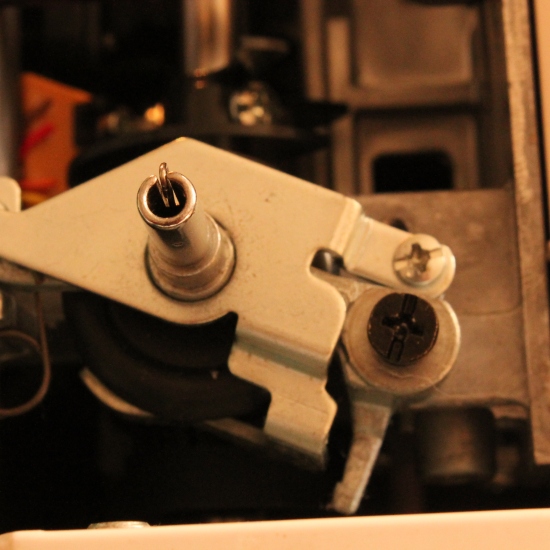
As you can see, this is all out of whack! 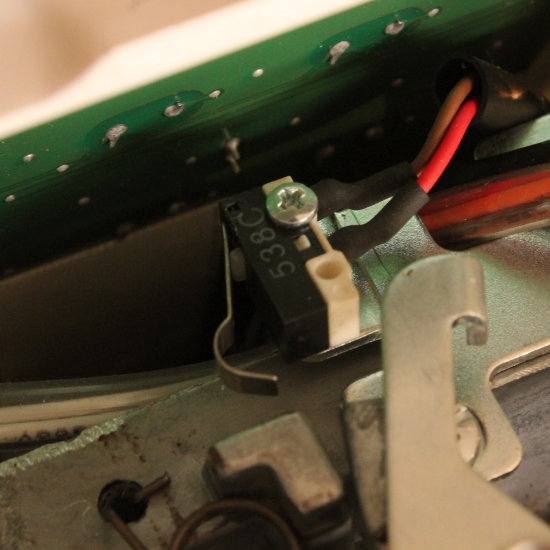
As you can see, my switch was way out of range for the switch. Loosen the screws, reposition and test until it’s all where it should be… 
Correct switching position ‘OFF’ 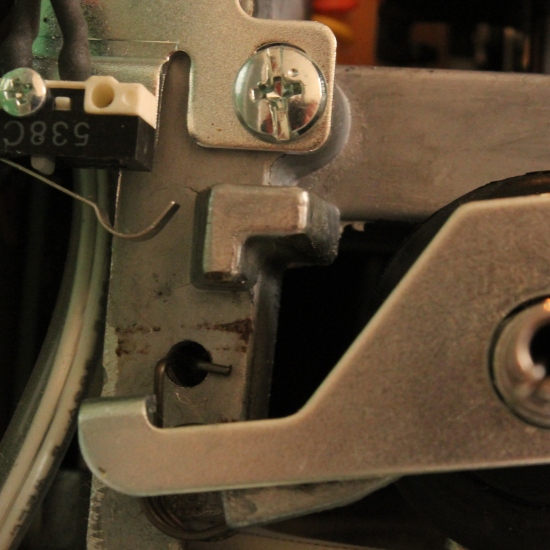
Correct switch postion ‘ON’ 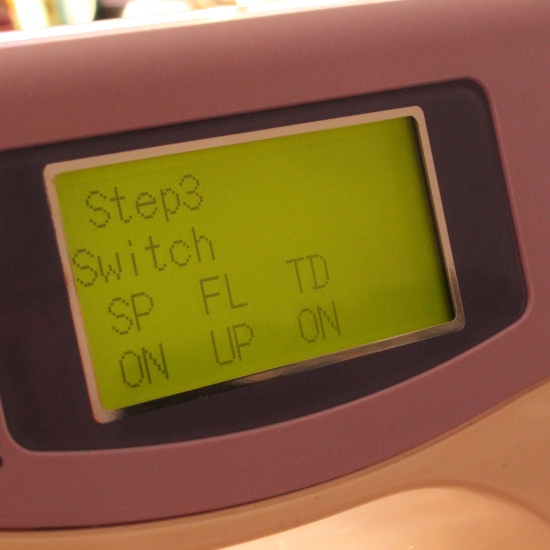
Screen showing position of spindle. ‘ON’ 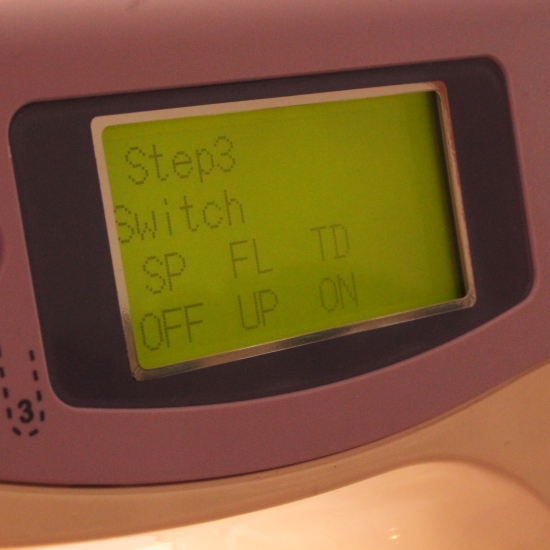
Screen showing position of spindle. ‘OFF’ - Once everything’s going the way you want it, tight set screws and replace cover.

And there you have it, you’re ready to go again 🙂

YOU ROCK just fixed my sewing machine you are AWESOME saved me I dont know how much money!!
No probs, Laura! Ha, people scoffed when they saw this post! But ha! I’ve helped someone save money and that’s all that matters 🙂 All the best, Laura 😀
THANK YOU! Brilliant instructions! Can carry on with my project now.
Thank you so much for the instructions! My husband & I just fixed my machine. Thanks again!
You are very welcome 🙂 sorry about the photo placement of the blog, for some reason WordPress wasn’t obeying my commands…
Thank you for posting this! I just fixed my Janome 4900MC the same way. Except I dropped one of the screws by the handles into the machine while putting it back together!
Oh dear!!! And it’s not the easiest to get back to, is it?!
Fantastic!! just fixed my machine in 15 minutes 🙂
Thanks for taking the time and trouble to put this solution on the web. I called Janome at Manchester and was facing a 100 mile round trip to get this repaired at a cost of £40 plus parts and VAT!
my only problem was that the small tab broke off the top cover, but all went back together well and the machine is working again.
Thanks once again!
That is quite alright, Chris. The reason I had to do it myself was because my nearest Janome service person at the time was more that 300km away. I wasn’t prepared to go through the expense so I decided to find the solution to the problem NOW. I am super happy that I could help so many people, around the world, to save money. 🙂
YOU ARE A LIFESAVER!
Seriously, my machine quit working this morning and I have spent the day sulking and worrying about getting it fixed. This evening I decided to see if it was a common problem. Google led me by the hand to your page, and after following your instructions carefully I have a happy machine ready to get sewing again tomorrow!
Thank you so so much for taking the time to share this online.
Sarah (London)
Hi Sarah. Thank-you for your kind words. I have updated the post to make it even easier to use. Happy sewing. Marce 🙂 (NZ)
Thank you! was reluctant to go in but got the job done and all it was was a loose screw. very tricky putting back together but done in under an hour. lost one screw from lid but not a major money saved.
I hope it was worth your time. I must say, when I pulled mine apart, one of the felt pads fell out. Not a major…One of the trials of DIYing. 🙂
You are wonderful!! Thank you for such complete instructions…I was a little scared opening up the casing but I followed your direction from step to step and I now have a workable machine without putting out any money and did it in less than an hour…THANKS SO MUCH
Thanks for your kind words. I’m so glad to have been such a help to you. You have a lovely Friday. 🙂
You are so incredibly AWESOME! My bobbin sensor and my Elna 6600 got stuck and I came across your page while looking for a fix. My husband repaired the machine for me in 15 minutes. Thank you again for posting this, it is REALLY REALLY appreciated!
I’m super stoked to be able to help. Did these instructions work on an Elna?
Hi there, yes it did work on my Elna 6600, they are made by Janome. Seriously, your instructions saved me a lot of heartache and frustration! Thanks again for your wonderful blip!
This was so helpful! The photos made it so simple. My afternoon sewing project is saved!
I have had such a wide variety of responses from this solution. This happened back in 2012 and my machine is still going strong!
Brilliant job. My wife had just been asked to make some gifts for a very good friend for Christmas, and guess what….yep, exact same problem occurred. A quick Google search came up with your photos and description and I was able to fix the machine in a very short while – a small screw had come loose preventing the micro switch from being activated. A quick tighten and job done. Many, many thanks. Christmas back on track!!
Thanks, Steve. I’m very glad that you got the machine back on track in such a short amount of time. 🙂
Just wanted to say thanks for the guide – she absolutely needed to use the machine today (Easter Sunday), and thanks to this excellent guide, the machine was up and running in under an hour. The only difficulties were unclipping the top (we did break a clip) and it initially wasn’t clear how the switch was adjusted from the pictures (the plate with the switch on has elongated holes, so loosen the 2 screws on the plate the switch is attached to, and slide the plate). Hope this helps people attempting this in the future. Thanks again for taking the time to post this up.
I’m glad you got on top of my instructions in the end. 🙂
I need to get on the band-wagon and sing your praises! Thank you so much for taking the time to write, photograph and publish this fix. Your explanations and photos completely demystified the process and instilled the confidence I needed to jump right in and fix it myself. I am a handy girl, but even I am a little nervous of opening up a sewing machine to fix what I believed was an electrical or computer problem. This simple (mechanical) fix was easy and pretty quick and got me sewing again in about half an hour. Machines always seem to break on Sundays! I was 90% finished with a shirt I was planning on wearing the same afternoon and suddenly experienced the bobbin error. You saved me time, money, heartache, and gave me power, joy and a perfectly working sewing machine! THANK YOU, THANK YOU, THANK YOU!!
You’re very welcome, Jen! I tell you, reading your comment after the day I’ve had at work has put me in a much nicer frame of mind. So, thank you! It’s lovely to know that, even 4 years later, my solution is still as valuable as it was the day I wrote it 🙂
I have tried step three but the menu comes up there are only four choices and the machine won’t take any of them so I think it needs the mechanic.
Sorry to hear that, Val. Let us know how you go.
Fantastic! I am so pleased to have managed this, thank you so much! My other machine is already in the menders, so I was getting a bit desperate!
OMGolly thank you so much for putting this here, I fixed my machine with your help. I say all else fails google it. and it works. Im so pleased that I didnt have to use my spare machine and spend heaps getting a repairer too.
My wife had the same problem, I think we have been here before but very pleased to be able to refresh how to do it, Many thanks.
It was a loose screw, this time I put a touch of instant glue on the head of the screw, and contact with the metal hopefully it will keep the screw from coming loose due to vibration.
Our machines are getting a bit ‘long in the tooth’ and we’ll be just experience more and more issues, I reckon. This is the only issue I’ve had with my machine, so far. Pretty lucky, really. All I know is that if I have issues I will endeavour to fix the problems myself and post it on here. 🙂
I’m commenting too – which I never do. The explanation, pictures, tutorial – excellent. I did it! I fixed my machine! And mine was just the little sensor being 2mm off. All I had to do was tighten the screw – and we were in working condition. I really appreciate the time you took to write this brief, however, so important, piece.
Thank you for your comment. I love that this has helped so many people . All the best!
R Payne
Your fix is still working, the loose screw strikes agin.
Adding to the “you are amazing!” chorus! Turns out I just had a loose screw so my bobbin sensor was never turning off! You really do rock.
Love from Scotland! xox
Thank you
I love you!!!
I thought all hope was lost, no money to buy a new machine or fix this one.
First google no success,
Last ditch attempt and no found your blog!
Thank you
Fixed in 20 minutes
Thanks 🙏🏽
Let me also add my thanks and gratitude to you for your generous post. This is late in 2018 and your information and photos quickly solved my bobbin issue. I am in the same position of many of the folks ahead of me. The machine shows the error while I am in mid project, service centres closed and hundreds of Kilometers away. I will endeavor to pay it forward. Thank you again.
Thank you. Saved me a trip to service man, and a long wait for repair. Instructions so easy to follow especially with great photos . My problem was a loose screw . All fixed . You are wonderful for taking the effort to make such a great tutorial. Susie (Australia)
Thank you so much.I has just finish my wife bobbin problem.
Follow as your excellence guide ,the best result.
Absolutely brilliant – thanks. It is now 1.00 a.m. and she is happy it now goes.
Great work. I’m glad my post is still helping many people.
Thanks for the heads up on this fix, an easy job and now all good. A happy wife is a good life hey. Cheers from the land of Oz down under.. 🤠😊
Happy wife does, in fact, equal happy life. Haha. You’re welcome.
You are STILL a lifesaver because of this blog! THANK YOU. I couldn’t believe it when I actually found a solution…online…for the very problem I had! Mentioned to my husband that, considering how old this machine is, if this problem had popped up just after I bought it, I probably wouldn’t have even THOUGHT of trying to find the solution online. AND, this is in the middle of the Corona Virus shutdown. Tackling several sewing projects that I had all the materials for for years…but never had the time for, until now. AND, I couldn’t have taken the machine in to be fixed no matter what, because the business I bought it from here in Mentor, is closed for the duration. BLESS YOU for taking the time. Stay well.
Hi Ginny,
I am stoked to hear that this is STILL helping people, and during such a time as COVID 19 lockdown.
Do take care during this time and have a happy time sewing.
Marce ❤
dsb
thank you
similar problem with janome 4800 also fixable
you truly are a legend
I dare say the further in time we go, the more useful this info will be. I’m glad I could help. And thank you for taking the time to write a response.
This also worked on a Janome 5900 Memorycraft. I was despairing until I found this as I live on a small Mediterranean island with no local Janome dealers and I live for quilting. You are wonderful to have taken so much trouble. I fixed this by myself following your awesome instructions. I can’t thank you enough for taking the trouble to show how to do this
Such an easy fix thank you so much! Day saved (and a bunch of money)